Dental implants are an excellent solution for missing teeth. They offer a permanent replacement that looks, feels, and functions like a natural tooth. Dental implant procedures have become increasingly popular in recent years due to their effectiveness and durability. However, many patients are unaware of the steps involved in the procedure. In this article, we will provide a step-by-step guide to help you understand what to expect during a dental implant procedure.
Step 1: Consultation and Planning

The first step in the dental implant procedure is a consultation with your dentist or oral surgeon. During this initial visit, your dental professional will examine your mouth and take X-rays or CT scans to assess your jawbone’s condition and determine the best course of action. They will also discuss your medical history, including any medications you are currently taking, and any previous dental work you may have had.
Based on the results of the examination, your dentist or oral surgeon will create a personalized treatment plan that outlines the number of implants you need, the type of implant, and the placement of each implant. They will also explain the procedure, discuss the anesthesia options and answer any questions you may have.
Step 2: Preparing the Implant Site
The second step in the dental implant procedure is the preparation of the implant site. Your oral surgeon or dentist will administer the local anesthesia for an area around your implant site will numb. They will then make an incision in the gum tissue to expose the jawbone. Next, they will use a series of drills to create a small hole in the bone where the implant will be placed.
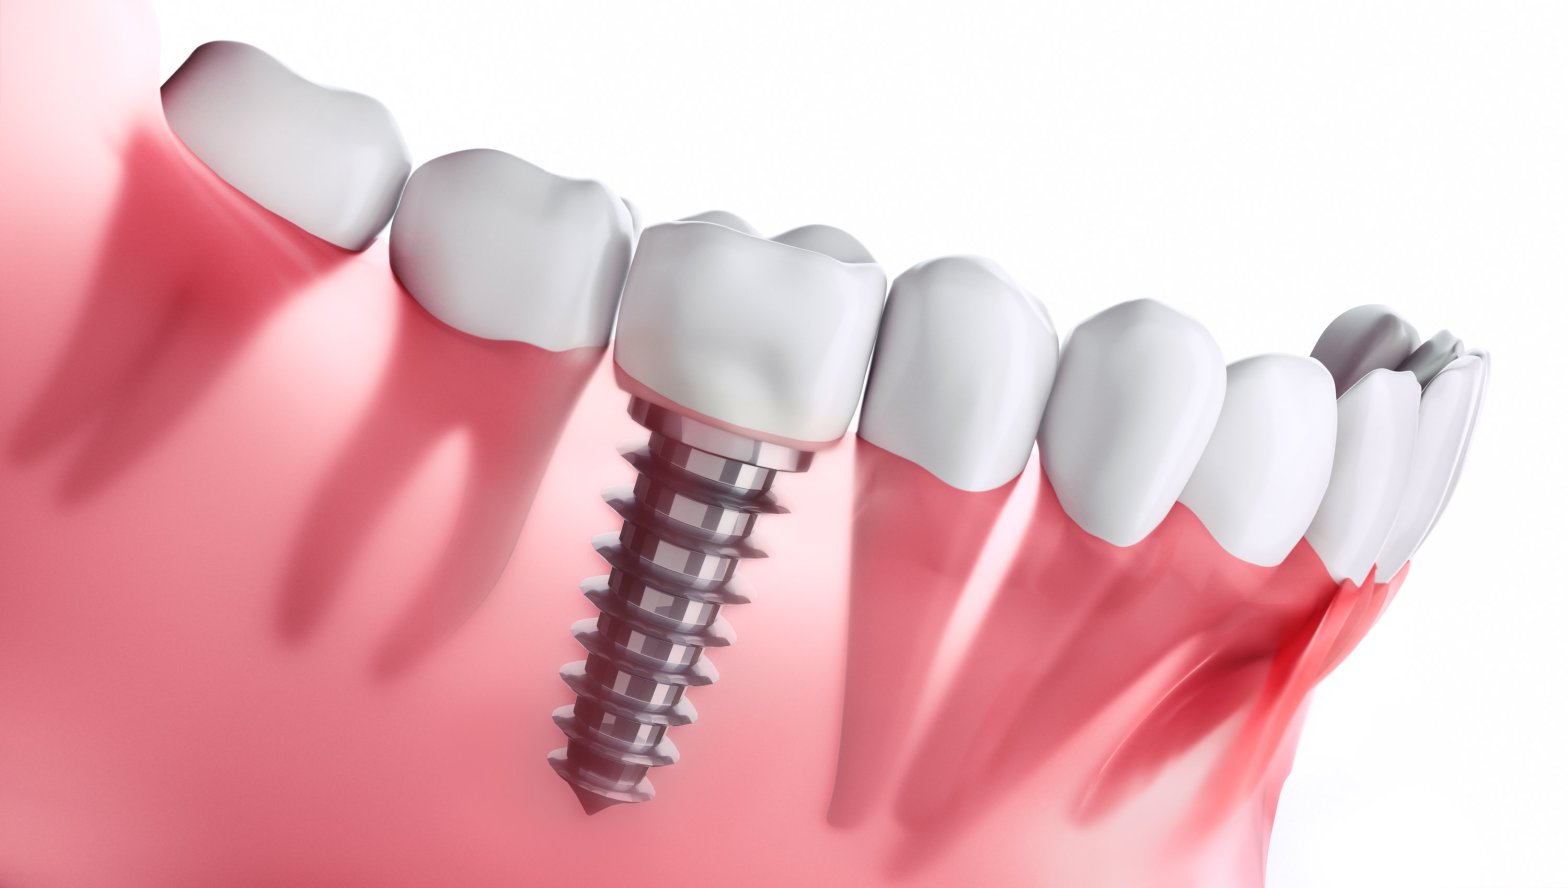
Step 3: Placing the Implant

The next step is placing the implant. The implant is a small, screw-like post made of titanium that is surgically inserted into the jawbone. Once the implant is in place, the gum tissue is sutured closed over the implant, leaving the little portion of the implant exposed above the gumline.
Step 4: Osseointegration
Osseointegration is the process by which the implant fuses with the jawbone. This process can take several months, during which time the implant becomes a permanent part of the jawbone. During this time, you will be fitted with a temporary restoration, such as a bridge or denture, to protect the implant and allow you to eat and speak normally.
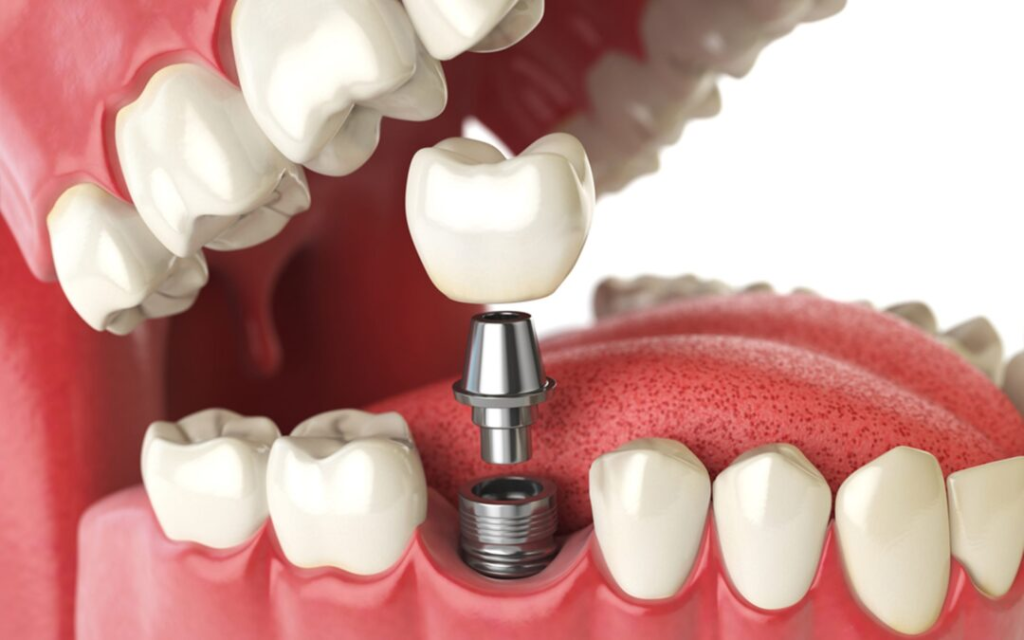
Step 5: Attaching the Abutment
Once the implant has fully fused with the jawbone, your dentist or oral surgeon will make that tiny incision in a gum tissue to expose the implant. They will then attach an abutment, a small connector piece, to the implant. The abutment will serve as a base for the final restoration.
Step 6: Placing the Final Restoration

The final step in the dental implant procedure is placing the final restoration. This can be a crown, bridge, or denture, depending on the number of missing teeth and the location of the implant. The restoration is custom-made to fit your mouth and match the color of your natural teeth.
In conclusion, dental implants are a highly effective solution for missing teeth, providing a permanent replacement that looks and functions like a natural tooth. The dental implant procedure involves several steps, including consultation and planning, preparing the implant site, placing the implant, osseointegration, attaching the abutment, and placing the final restoration.
Other recommended posts
